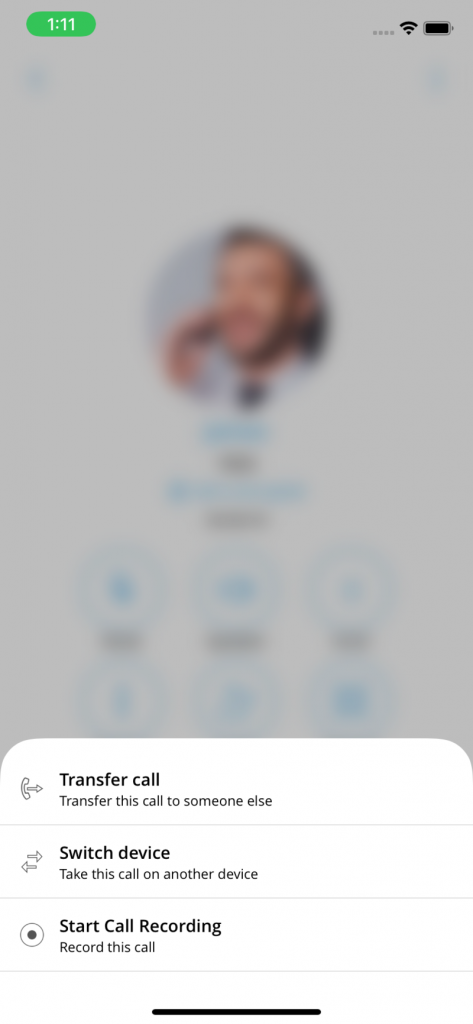
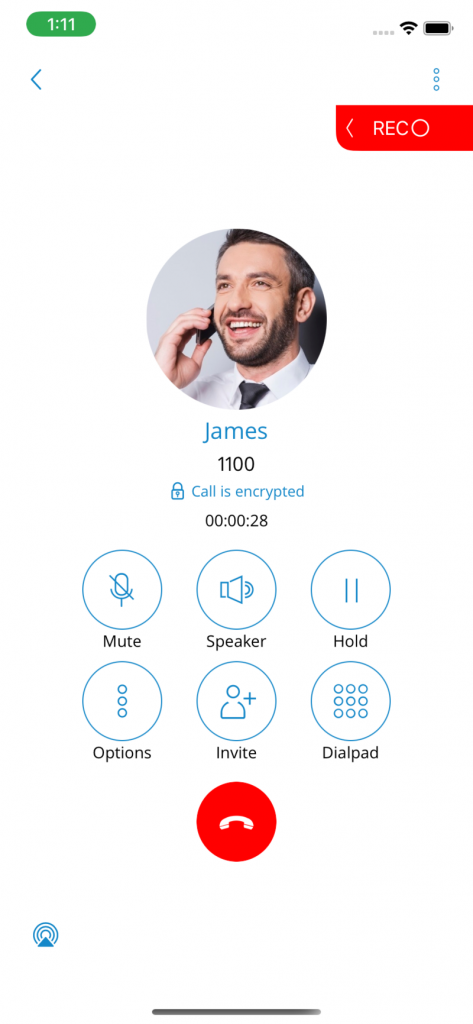
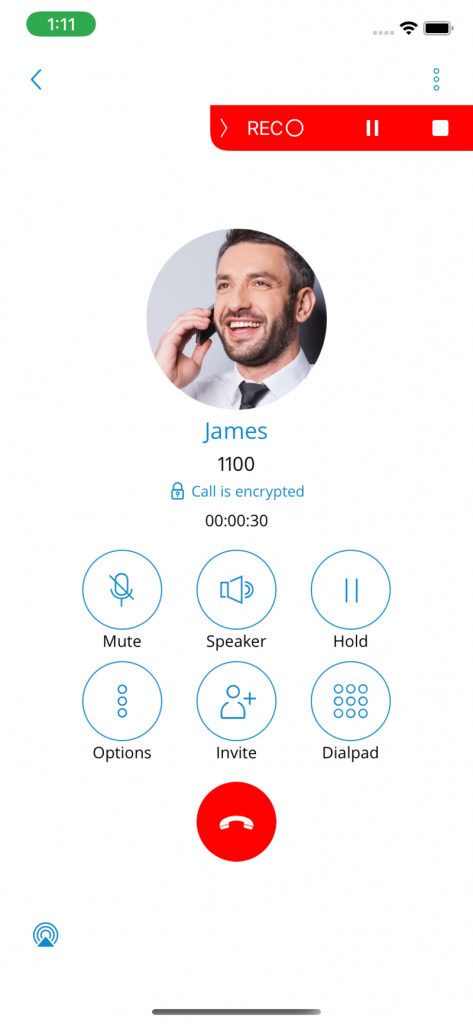
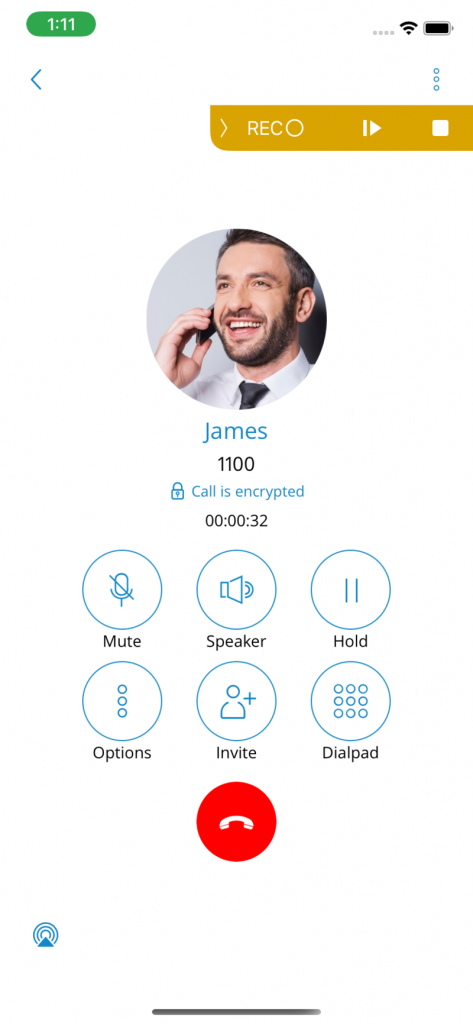
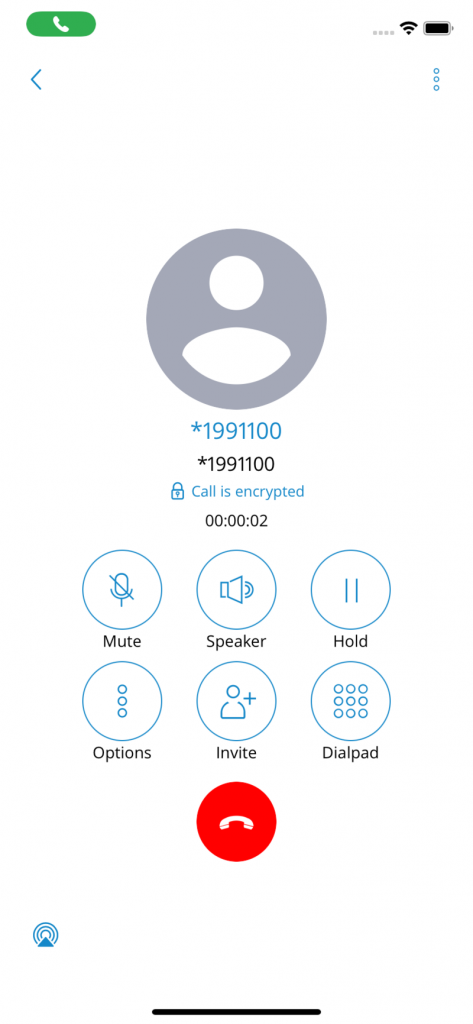
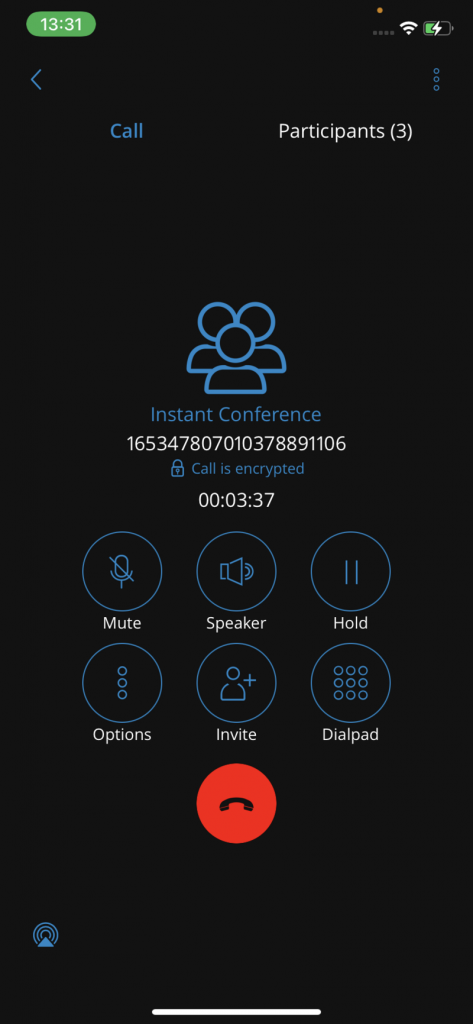
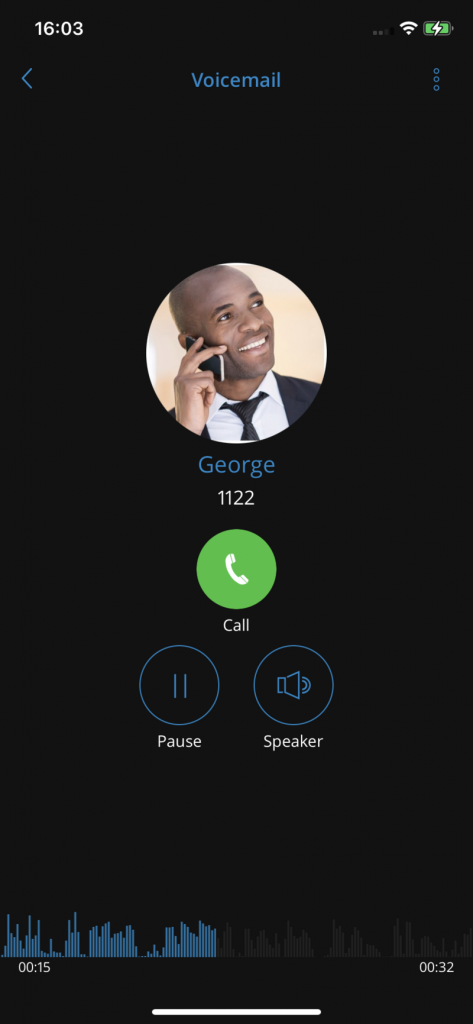
The Ultimate Guide to Our Communicator 7.0 App

Communicator Go 7.0 is the softphone application that integrates directly with your Zappie phone system, revolutionising communications in modern workplaces. In this guide, we'll take you through all of the features and how to's, to ensure you're using the app as efficiently and effectively as possible.

Logging In

For all of our customers, we will send you a dedicated QR code.

When opening the app for the first time, press the SCAN QR CODE button and point your phone camera at the monitor. Once the QR code image is detected Communicator GO will fill out all the fields necessary for login.

Setting A New Password After Logging In For The First Time

When you log in to the Communicator GO app for the first time, you will be asked to change the password.

You will have to enter a new password and retype it to confirm it. If you make a mistake, so the password entries do not match, or if the password is not strong enough, the NEXT button will stay disabled. Once the password matches our strength criteria, you’ll be able to log in.

Changing Your Avatar

You can change your avatar in Communicator Go by heading to your Profile screen and tapping the avatar icon above your name and extension.

Once you tap the icon, you’ll be given the option to either take a new photo or choose one from your gallery. After that, you’ll be able to crop the image to your liking:

  • Tap and hold inside the blue box to move it

  • Tap and drag the blue edges to resize

  • Hit Done to save your new avatar

  • Or tap Cancel if you change your mind

Biometric Authentication

You can unlock Communicator Go using biometric authentication – like fingerprint or face recognition – for an extra layer of security.

To use this feature, make sure biometrics are enabled both on your device and in the app settings. You’ll find the option under Settings > Security.

Phone

When you open Communicator Go, you’ll land on the default dialer screen. The call button here can appear in one of three colours, depending on your connection and registration status:

🟢 Green – You’re good to go. Calls will be made over the internet using the SIP protocol (Wi-Fi or mobile data).

🟡 Yellow – You’re not registered, but if the Callback option is set up, you can still place calls using mobile data.

🔘 Grey – You’re offline, so calls can’t be made. Check your network connection.

Calls

Once a call is connected, you can perform several actions:

Mute

Tap Mute to turn off your microphone. This stops any background noise or chatter on your end from being heard during the call.

Speaker

Hit the Speaker button to switch to speakerphone mode - great if you don’t want to hold the phone to your ear or if someone else in the room needs to join the conversation.

Hold

Tap Hold to place the caller on hold. They’ll hear your system’s Music on Hold until you tap Hold again or transfer the call somewhere else.

Press Options to access additional call features during your conversation.

Transfer

Need to pass the call to someone else? Use Transfer to send it directly or supervise the transfer to another PBXware extension or external number.

Switch Device

Tap Switch Device if you want to move the call to another device — like your desk phone, softphone, or another number saved under My Phone Numbers.

Call Recording

If call recording is enabled for your extension, you’ll see a Record option. You can start recording at any point, and a visual indicator will show it’s active. You’ll also have the ability to pause, unpause, or stop the recording mid-call.

Invite

Use Invite to turn your call into an instant conference. You can add people by dialing their extension or selecting them from your contact list.

Dialpad

Need to interact with an IVR or voicemail system? Tap Keypad to send DTMF tones during a call.

Multiple Calls

Communicator Go lets you handle two calls at once. If you’re already on a call and another one comes in, you’ll see the second call appear on your screen.

If you choose to answer it, your first call will automatically be put on hold. Once one of the calls ends, Communicator Go will return to single-call mode.

Recent Calls

Tap the Recents tab at the top of the Phone screen to see a list of your recent calls.

At the top right, you’ll see a search icon – use this to filter your call history by name or number if you’re looking for someone specific.

If you tap the avatar next to any call, you’ll open a contact info screen with more details about that person.

Want more options? Just press and hold on any call in the list to quickly send a message, fire off an email, or copy/edit the number.

Call Transfer

Select a contact

This brings up your favourites, other users, and phone book contacts – just tap the person you want to transfer the call to.

Enter a number

If you know the number, you can type it in directly instead of picking from your contacts.

After that, just choose whether you want to do a Direct or Supervised transfer to complete the process.

Call Recording

Once you start recording a call in Communicator Go, you’ll see a clear indicator on the screen showing that the recording is active.

You’ll also have the option to pause, resume, or stop the recording at any time during the call.

Call monitoring in Communicator Go lets you listen in or join live calls on specific extensions.

Call Monitoring

If call monitoring is enabled for your account, you’ll see a three-dot menu inside each extension profile. Tap that menu to access the Call Monitor option.

Conference Calling

With Communicator Go, you can host or join conference calls with multiple people – whether they’re internal team members or external contacts.

There are two types of conference calls you can use:

Instant (Dynamic) Conferences

You can start a conference on the fly by adding people to an active call or by creating one through the Conferences section. You’ll be able to add contacts from your list or type in any number.

If you miss an instant conference, don’t worry — you can still join from your Call History, as long as the conference is still active. Just tap the Dial button to jump in.

Static Conferences

These are pre-set conference rooms created by your PBXware administrator. You’ll see the conference name and number listed in your Conferences section.

When you tap on an ongoing static conference, you’ll see a list of participants and a Join this conference button at the bottom. The participant list updates in real time as people join or leave.

Inside a conference, participants are grouped into two sections:

  • In this conference – for those already connected

  • Invited – for those who’ve been called but haven’t joined yet (they’ll show as Ringing or No answer)

Directory

The Directory tab brings together all your key contacts, including:

  • Users

  • Device contacts

  • Central phonebook entries

  • Favourites

You can view users in grid (default) or list format, and sort them by presence or department.

Tapping on a user’s name or avatar opens their profile screen, where you can:

  • View their email, presence status, and custom message

  • See all associated phone numbers

  • Call, start a chat, send a voicemail, or add to favourites

  • Tap any listed number to dial directly

To search your Communicator GO contacts:

  1. Tap the search icon in the upper right corner

  2. A search bar will appear

  3. Search by contact name or number

Search results include users, device contacts, phonebook entries, and favourites.

Synchronise Central Phonebook Contacts

The Central Phonebook is a shared directory available to all users within the same system. It allows team-wide access to common contacts—ideal for managing external partners, suppliers, or key clients.

Accessing the Central Phonebook

  1. Navigate to the Directory tab via the bottom navigation bar.

  2. At the top of the screen, tap the Contacts tab (one of the three tabs available).

  3. You’ll be taken to the Contacts screen, which now includes a banner and additional controls.

Phonebook Banner

At the top of the screen, you’ll see a banner that indicates which Phonebook you’re currently viewing:

  • Phonebook Name (e.g., Central or Local)

  • A button to switch between Phonebook types

  • In the Central Phonebook, there’s also a refresh button to update the contact list

Central Phonebook Contact Entries

Each contact in the Central Phonebook includes:

  • Name

  • Company name

  • A list of labelled phone numbers (e.g., mobile, work, direct)

Local vs Central Phonebook

The Local Phonebook retains its familiar layout, with the only noticeable difference being the new banner at the top for switching views.

Favourites

Using Favourites in Directory

Favourites allow users to quickly access their most important contacts—ideal for speeding up actions like transferring calls, starting chats, or placing quick calls.

Adding & Removing Favourites

There are two ways to add or remove contacts from your Favourites list:


1. From the User Details Screen
• Tap on a user’s name or avatar to open their profile
• Press Add to Favourites or Remove from Favourites as needed


2. From the Phonebook
• Tap on a contact’s number
• Select Add to Favourites or Remove from Favourites from the options

Accessing Favourites

To view your favourites:

  1. Go to the Directory tab (bottom navigation)

  2. Tap the Favourites tab in the top bar

Your favourite users and contacts will appear here—always at the top when performing actions like call transfers or lookups.

Meeting

Communicator GO Meeting enables seamless collaboration with multiple users through an all-in-one virtual meeting solution. It supports:

  • Video Conferencing – switch between grid view and speaker view

  • Audio Conferencing

  • Screen Sharing – share either a specific application or your entire screen

  • Remote Control – grant control during screen sharing for real-time collaboration

  • Group Chat – exchange messages with all meeting participants

How to Access Meetings

  1. Tap the Meetings icon in the navigation bar
  2. From here, choose to start, schedule, or join a meeting

When a meeting begins, the app automatically redirects you to the Communicator Meeting GO app for the full meeting experience.

Scheduling a Meeting

At the bottom of the Meetings screen in Communicator GO, you’ll find a floating action button. When pressed, it reveals three key meeting options:

1. Join an Active Meeting

  • Allows you to join an existing meeting by entering a Meeting Number

  • After entering the number and tapping Join, you’ll be redirected to the Communicator Meeting GO app

2. Create an Instant Meeting

  • Opens a screen to start a meeting immediately

  • You can choose to make the meeting Public or Private

  • Add participants by:

    • Selecting users from the Directory

    • Manually entering external email addresses

3. Schedule a Meeting

  • Opens the Schedule Meeting screen where you can plan a meeting in advance

  • Required fields include:

    • Title – Name of the meeting

    • Description – (Optional) Details or agenda

    • Date – Day of the meeting

    • Starts at – Meeting start time

    • Duration – Length of the meeting

    • Recurring – Choose how often the meeting repeats:

      • Never – One-time meeting (default)

      • Every Day – Repeats daily at the same time

      • Custom – Opens additional options for custom recurrence

  • Add Participants from the Directory

  • Add External Participants via email

  • Choose whether the meeting is Public or Private

Meeting Info Screen

When you tap on a meeting from your scheduled list or history in Communicator Go, you’ll see a screen with all the details, including:

  • Organiser

  • Subject

  • Description

  • Meeting number

  • Start time

  • Duration

  • Status

  • Public or private

  • List of participants

If you’re the organiser and the meeting hasn’t started yet, you can tap the Edit button in the top right corner to make changes.

If it’s a recurring meeting, you’ll be asked whether you want to edit just this one or all future meetings. You’ll see three options:

  • Cancel – don’t make any changes

  • Yes – update only this specific meeting

  • Yes to all – update all future occurrences

The buttons you see at the bottom of the screen will change based on the meeting’s status and your role:

If the meeting is scheduled and you’re the organiser:

  • Start – kicks off the meeting

  • Delete – removes the meeting

If the meeting is in progress and you’re the organiser:

  • Join – enter the meeting

  • End – close the meeting for everyone

If the meeting is in progress and you’re not the organiser:

  • Join – hop into the meeting

If the meeting is finished and you’re the organiser:

  • Clone – opens a pre-filled form to schedule a new meeting based on the finished one

  • Delete – removes the meeting from history

If the meeting is finished and you’re not the organiser:

No further actions are available.

Meeting Dashboard Panel

From the Dashboard in Communicator Go, you can quickly start, join, or schedule a meeting using the Quick Actions panel. You’ll see three options:

  • Join Meeting – enter an existing meeting by entering the meeting number

  • Instant Meeting – start a meeting right away with no scheduling needed

  • Schedule Meeting – set up a meeting for later, with all the details and participants

Voicemail Management

With Communicator Go, you can listen to both new and archived voicemails, and you have the option to archive or delete one or multiple messages at a time.

Playing Voicemail Messages

To play a voicemail in Communicator Go, just tap on it from the list and hit Play.

If the message hasn’t been downloaded yet, you’ll see a progress bar while it loads. Once the download is complete, playback will start automatically.

Deleting or Archiving Voicemail Messages

In Communicator Go, you can delete or archive a voicemail by opening the message and tapping the appropriate icon from the menu in the navigation bar.

If you want to manage multiple messages at once, just press and hold on a message in the list to select it, then tap the delete or archive icon from the toolbar.

Presence

The Presence feature in Communicator Go lets you see your colleagues’ availability – whether they’re online, busy, away, or offline. You’ll also be able to see when someone was last active.

To view presence, head to the Directory tab at the bottom of the screen. By default, online users appear at the top (sorted alphabetically), followed by those who recently went away, and then offline users.

You can switch between Grid and List view to see the layout that works best for you.

Pressing your colleague’s avatar on Directory and opening the user’s info screen, more presence information is available.

To update your presence status in Communicator Go, tap on Profile from the bottom menu. If you don’t see it right away, tap More and you’ll find it there.

From your profile screen, tap your current status (or the small down arrow next to it) to open the presence settings.

You’ll see a pop-up with three fields:

  • Status – choose how you want to appear

  • Message – optional, if your status allows a custom message

  • Duration – decide how long this status should stay active

Default Status Options:

  • Available (green icon)

  • Busy (red icon)

  • Do Not Disturb (red icon with a rectangle)

  • Away (yellow icon with a clock)

If your system admin has set up any custom (predefined) statuses in PBXware, you’ll be able to choose one and add a custom message that others will see.

Duration Options:

  • Today

  • 1 hour

  • 4 hours

  • 8 hours

  • 12 hours

  • 2 days

  • 5 days

  • This week

  • Always

Dashboard

The Communicator Go dashboard gives you a quick overview of your call activity and easy access to key features – including Enhanced Services.

From the dashboard, you can easily access:

  • Your Profile info

  • Today’s call stats

  • Recent calls

  • Call options & Voicemail

  • Your Favourites

  • Quick Actions for starting, joining, or scheduling meetings

We'd love to hear from you.

Our expert team are on-hand to answer any queries.

Get in touch today

By submitting this form, I agree that I have read the Privacy Policy and confirm that Zappie store my personal details to be able to process my request.

Check out these other blogs.

Finding the right phone system for your small business in 2025 doesn't have to be overwhelming. With AI-powered features, flexible pricing, and cloud-based solutions revolutionising business
In today's rapidly evolving digital landscape, artificial intelligence is revolutionizing telecommunications and Voice over Internet Protocol (VoIP) systems. As businesses seek more efficient, cost-effective communication solutions,
Voice over Internet Protocol (VoIP) has revolutionised business communications, offering a flexible, cost-effective alternative to traditional phone systems. As organisations embrace digital transformation, VoIP stands at
In today's competitive business landscape, every missed call could be a missed opportunity worth thousands of dollars. Traditional phone systems often leave businesses scrambling to keep
Running a small business doesn't mean you have to sound like one. In today's competitive marketplace, first impressions are everything – and often, that first impression
The modern workplace has undergone a fundamental transformation. Gone are the days when employees were tethered to physical office spaces, bound by traditional phone systems and

Supercharge your business communications with Zappie.

We’re on a mission to revolutionise the telecommunications landscape by providing businesses with reliable VoIP phone systems and fast business broadband, whilst ensuring an unwavering commitment to customer support.

Never miss a word with our advanced business phone systems.

Call recording

Enhance customer service and stay in line with PCI compliance with our unlimited call recording.

Call reporting

Never miss an opportunity by setting up automated missed call reports as well as call conversion rates.

On-hold marketing

Project your company messages to a captive audience and choose your own on-hold music.

CRM integration

See which customer is calling you and pull up important data right from your handset.

Speed guarantee. We’ll always find the fastest network in your area at the best price.

Superior access

We can acquire a broad range of networks and routers, meaning the best speeds are always achievable for your business.
business broadband zappie communication

5G backup

Our routers include a 5G back-up SIM so you business can stay connected, even when your network is down.

Proactive support

With the back-up SIM, we can see when your network is down and can proactively support you to get any issues resolved.

Remote management

We can access our routers remotely so can often find a quick fix without having to deploy an engineer, saving your business time and money.

Save up to 30% on the latest mobiles. Unbeatable prices with a seamless transition.

Latest models

We are able to get hold of the most up-to-date smartphones available. iPhone 15 Pro Max? Samsung Galaxy S23? We can get it all!

Hand-selected network

We aren’t a network provider so when we set up your phone, we can find you the best service available in your area. From any network.

Keep your number

We make it as easy as possible to switch to us and we’ll never ask you to change your number.

Mega savings

We can offer some great deals on mobiles, saving your business up to 30%.

Find the fastest broadband available in your location.

Someone will be in touch shortly

One of our broadband consultants will talk you through the best internet options.

Someone will be in touch shortly

One of our broadband consultants will talk you through the best internet options.